Want to add a fun, vintage twist to your summer style? DIY bead sunglasses are the perfect way to make your shades stand out! With just a few beads and a little creativity, you can turn an ordinary pair of sunglasses into a unique fashion statement.
Whether heading to the beach, a music festival, or just out for a sunny stroll, these handmade accessories will give your look a retro edge. Plus, they’re easy to make and customizable, so why not craft a pair as bold and colorful as you are?
Keep reading and discover how you’ll rock this accessory! Let’s get started!

Key Takeaways
-
DIY bead sunglasses are a fun and easy way to personalize your summer accessories. With just a few materials like beads, a hot glue gun, and sunglasses, you can create a unique fashion statement.
-
Planning your design ensures the best results. Choosing the right beads, laying out patterns beforehand, and working carefully with glue help create a polished look.
-
Adding a sunglass chain enhances both style and functionality. Optional chains can give your sunglasses a trendy, high-fashion touch while keeping them secure.
-
This creative project is great for self-expression or gifting. Whether making them for yourself, as party favors, or as stylish accessories, DIY beaded sunglasses add a unique flair to any outfit.
Materials and Tools You’ll Need
Ready to create your standout beaded sunglasses? Consider these materials and tools to craft these eye-catching accessories.
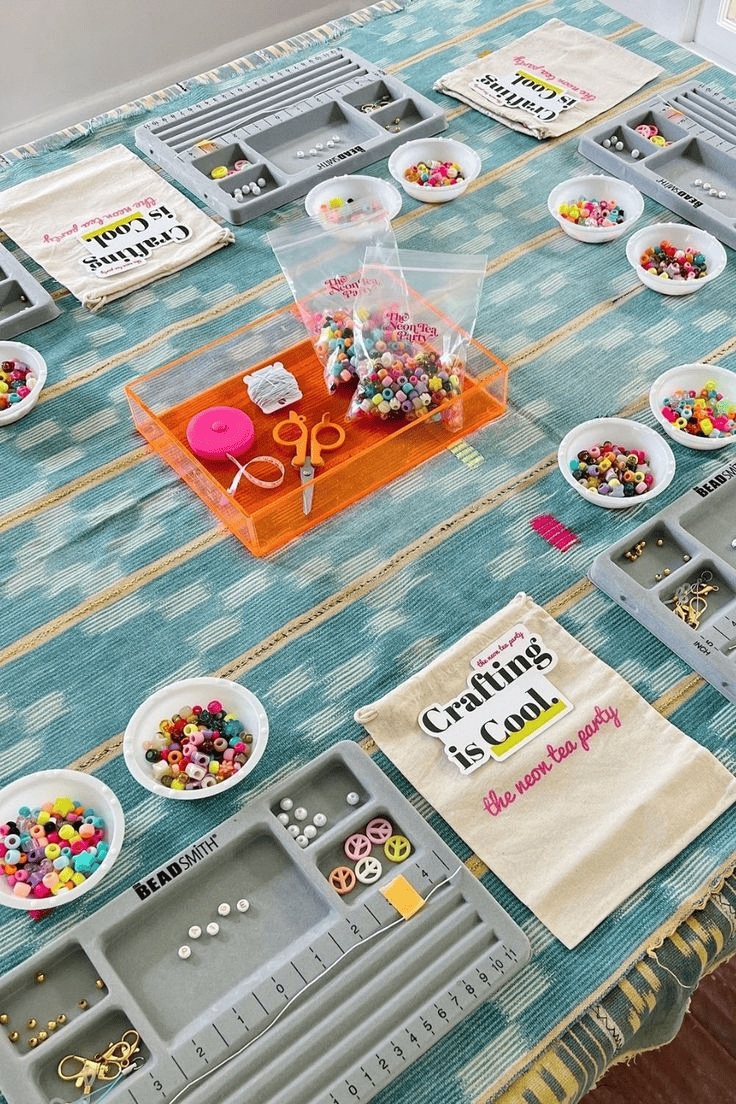
Beads
Credits: @theneonteaparty / Pinterest
- Crimp Beads: These are small beads essential for securing your design and ensuring durability.
- Glass Beads & Seed Beads: These add vibrant colors and intricate patterns to your sunglasses with these beads.
- Gold Beads & Letter Beads: Personalize your design with metallic accents and custom messages.
Tools
- Hot Glue Gun: A reliable hot glue gun is crucial for securely attaching beads to your sunglasses.
- Eyeglass Chain End Pieces: These components are perfect for finishing your sunglass chain with a professional touch.
By gathering these materials and tools, you’re well on your way to creating a unique pair of beaded sunglasses that reflect your style.
Step-by-Step DIY Beaded Sunglasses Tutorial
With all our materials ready, it’s time to make your beaded sunglasses! Just follow these easy steps to create a stylish accessory that showcases your personality:
Step 1: Prepare Your Workspace
Credits: @aaswift69 / Pinterest
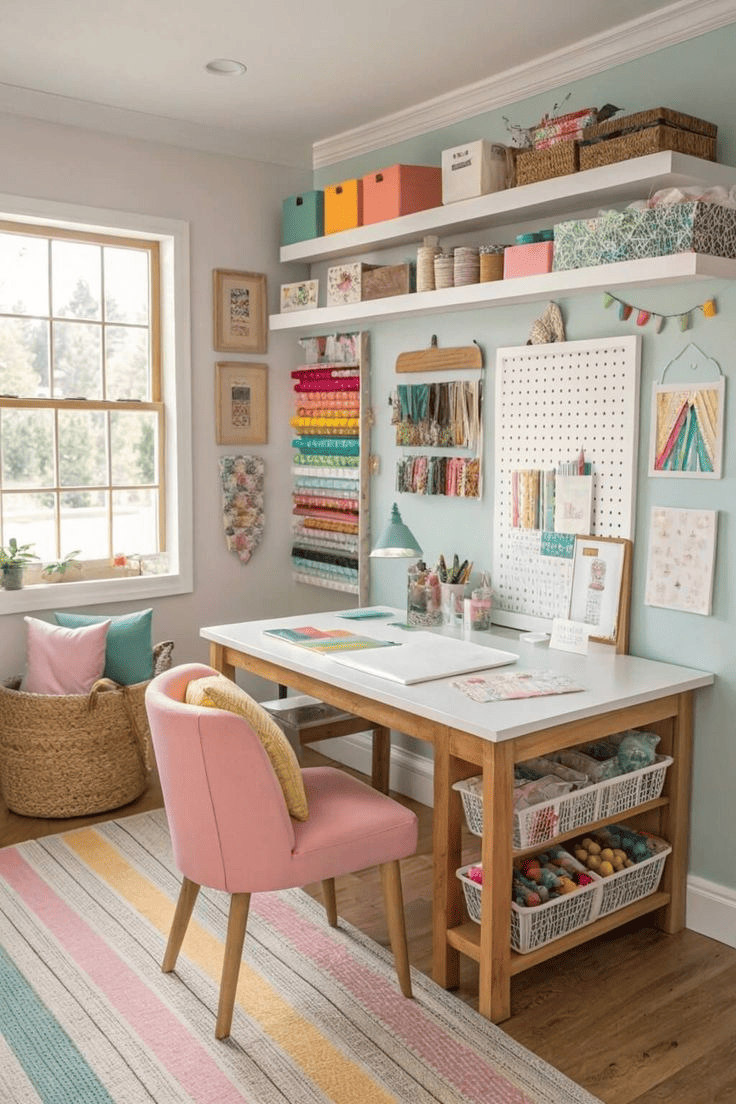
Before starting your DIY beaded sunglasses, setting up a clean and organized workspace is important. Having a proper work area will make the process easier and help prevent accidents, such as knocking over small beads or getting hot glue in unwanted places.
Choose a flat, stable surface, like a desk or table, and cover it with a protective layer. In my projects, I use parchment paper, but you can also try a craft mat or newspaper. This layer helps catch any glue drips.
Then, make sure you have all your materials within arm’s reach—your sunglasses, beads, hot glue gun, tweezers, crimp beads, and eyeglass chain end pieces. Having this setup saves me time from searching for items in the middle of crafting.
If you’re using tiny beads, such as seed or glass beads, consider using a bead organizer or small bowls to separate them by color and size.
Good lighting is also essential, especially when working with small beads. A desk lamp or natural light will help you see details more clearly.
Lastly, wear comfortable clothing that you don’t mind getting glue on—I use my “DIY work clothes” during these adventures. Do you have one, too?
For those with long hair, it’s vital to tie back loose hair to avoid distractions.
With everything set up, you’re ready to start crafting your sunglasses masterpiece!
Step 2: Choose and Plan Your Sunglasses Design
The key to making the cutest glasses lies in careful design planning. Instead of gluing beads randomly, visualize your design before attaching anything permanently.
Start by selecting a pair of sunglasses with a sturdy frame—plastic or metal frames work best since they provide a solid surface for the glue and beads to adhere to.
Next, lay out your chosen beads along the sunglasses frame without gluing them yet.
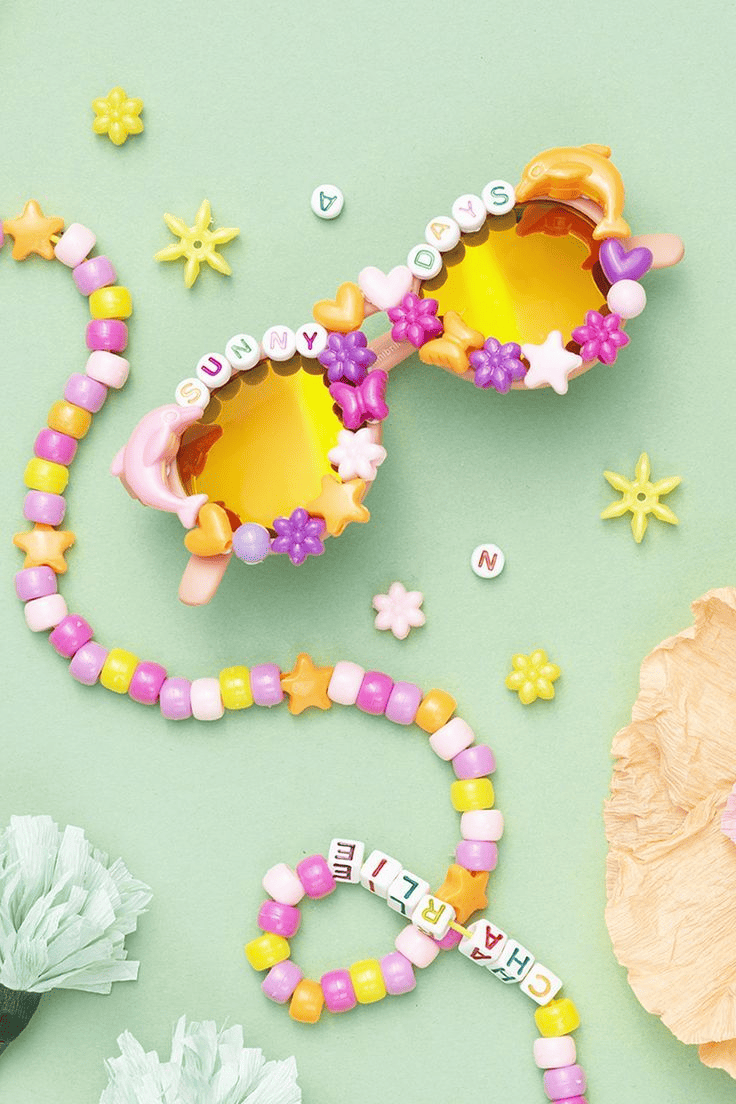
Arrange them in different patterns to see which combination you like best. With cowrie shells, you can go for a boho-chic look, a playful summer vibe with bright seed beads, or an elegant touch with gold beads and letter beads that spell out your name or a fun word.
If you want a structured design, sketch a rough idea on paper before placing the beads. This is especially helpful if you’re following a DIY tutorial and want to match a specific aesthetic.
Don’t be afraid to experiment with bead placement and color coordination—mixing different textures and sizes will give your own sunglasses a unique, customized look.
Once you’re happy with your design, take a picture to use as a reference before proceeding to the next step.
Step 3: Attach the Beads
Credits: @pandurohobby / Pinterest
Now comes the exciting part—attaching the beads to your sunglasses frame!
First, plug in your hot glue gun and let it warm for about 5 minutes. Test the glue on a scrap piece of paper to ensure it flows smoothly. Too much glue can make your design look messy, while too little may not hold the beads securely.
Start with the largest beads first, as they serve as anchors for the smaller ones. Apply a small bead of glue to the frame, then carefully place your glass, gold, or letter bead into the glue using tweezers. Hold it in place for about 10 seconds to ensure a firm attachment.
Continue working in small sections, adding beads individually and allowing the glue to set between placements.
For a cleaner finish, wipe away excess glue before it dries.
If you make a mistake, don’t worry—you can remove misplaced beads by gently reheating the glue with the tip of the glue gun. Work patiently, and soon enough, your beaded sunglasses will begin to take shape with a fun, stylish design!
Step 4: Add Sunglass Chains (Optional)
Credits: @indyaralessas / Pinterest
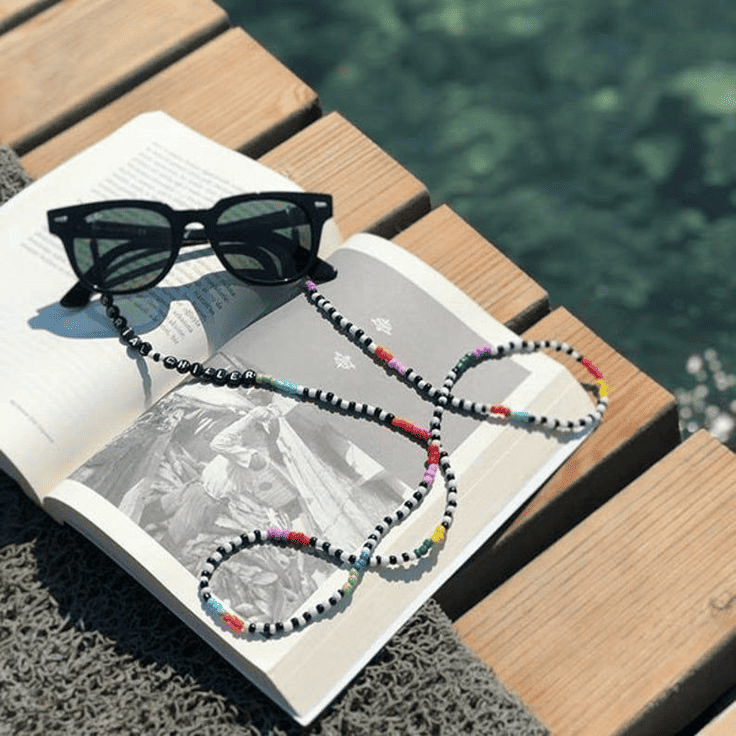
For those who want an extra stylish touch, adding a sunglasses chain is a great way to enhance your design. Not only does it add personality, but it also keeps your sunglasses secure and easy to wear.
There are many sunglass chains available, from simple gold chains to beaded, pearl, or even New Zealand-inspired woven styles.
To attach the chain, you’ll need crimp beads and eyeglass chain end pieces.
First, thread the crimp bead onto one end of the sunglass chain, then loop it around the sunglasses’ arm and back through the crimp bead. Use pliers to flatten the bead, securing the chain in place. Repeat on the other side.
If you’re using a beaded sunglasses chain, ensure your beads are evenly spaced and secured with crimp beads. This small detail will ensure your chains look professionally made.
This optional step will give your sunglasses a high-fashion finish, whether you choose a dainty gold chain or a bold, colorful beaded style.
Step 5: Allow the Glue to Dry
This step requires patience but is crucial for making sure your beaded sunglasses last. Once you’ve glued all your beads, set the sunglasses aside to dry completely. While the glue may feel dry within minutes, it’s best to wait at least 24 hours for a fully secure bond.
Place your sunglasses on a flat work surface and avoid touching them while they are set. If you’ve used a lot of glue, you might notice slight glue strands—these can be carefully trimmed away with small scissors once everything is dry.
While waiting, this is a great time to clean up your workspace and put away any leftover small beads. If you’re making these sunglasses as party favors, you can start packaging them in cute pouches for gifting.
After a full day of drying, your DIY beaded sunglasses will be sturdy and ready to wear.
Step 6: Final Touches

Credits: @nylonmag / Pinterest
The last step is making sure your beaded sunglasses look flawless.
Take a close look at your design and check for any gaps where beads might be missing. If you spot an uneven area, add some glue and carefully place another bead to fill the space.
Next, gently wipe the sunglasses with a soft cloth to remove any glue residue.
If you added a sunglasses chain, give it a light pull to ensure it’s securely attached. Try on your sunglasses in the mirror and admire your handiwork—if something looks off, now’s the time to fix it.
Lastly, take pictures of your final product—remember to tag me when you post them!
These handmade sunglasses will impress you whether you plan to wear them to a summer event or gift them as party favors.
Following these simple steps lets you create a one-of-a-kind accessory that adds a fun, vintage touch to any outfit. Step outside and enjoy a great day with your stylish new sunglasses!
Where to Find Supplies

Credits: @sweetlittlecupcake / Pinterest
Congratulations on completing your DIY beaded sunglasses! Time to find supplies for future projects and some creative ways to use your new accessory.
- Local Craft Stores: Visiting a local craft store is a great way to find beads, glue guns, and chains for your DIY projects. These stores often carry a wide variety of materials, allowing you to see and feel the items before purchasing. Plus, you can seek advice from knowledgeable staff on selecting the right supplies.
- Online Stores: For a broader selection, online retailers offer convenience and variety. Many websites provide affiliate links to recommended products, making it easier to find quality materials. Additionally, international suppliers, including those in New Zealand, offer unique beads and accessories that can add a distinctive touch to your creations.
Creative Uses for Your DIY Beaded Sunglasses
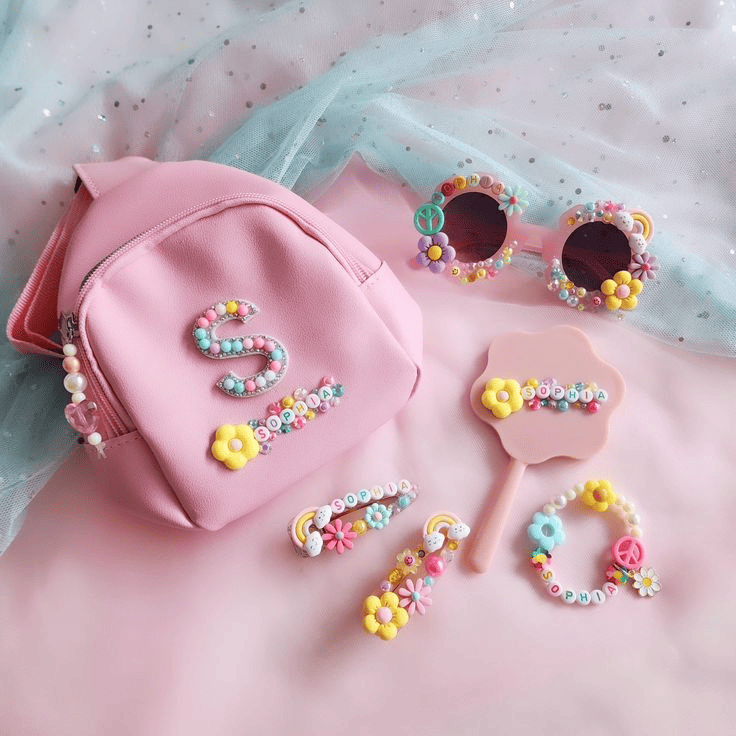
Credits: @Scarlettandsisters_ / Pinterest
Crafting your stylish sunglasses is one thing—showing them off is another! These custom accessories aren’t just for summer outings—you can use them in fun and creative ways.
Whether you’re gifting them, styling them for an event, or simply making a fashion statement, your handmade sunglasses will add a unique touch to any occasion. Here are some great ways to put them to use:
- Party Favors: Custom beaded sunglasses make unique and memorable party favors. Whether it’s a birthday, bridal shower, or summer gathering, guests will appreciate this personalized gift that combines style and function.
- Showcase Personal Style: Adding beads to sunglasses is a great way to express your individuality. Choose colors and designs that reflect your personality, making your accessory a true extension of yourself.
- Long-Lasting Style: Engaging in this simple DIY project adds a unique flair to your wardrobe that can last for seasons. Handmade accessories often become cherished items, and your beaded sunglasses are no exception.
Exploring these supply sources and creative uses lets you continue to enjoy and share the joy of DIY beaded sunglasses.
Conclusion
Crafting your own beaded sunglasses is a fun and creative way to add a personal touch to your summer style.
From gathering materials to carefully placing each bead, this DIY project allows you to design a one-of-a-kind accessory that reflects your personality. Whether you go for bold colors, elegant pearls, or playful letter beads, your custom sunglasses are sure to turn heads.
This simple DIY project is not just about making a fashion statement—it’s also a great way to unwind, explore your creativity, and even create meaningful gifts or party favors.
Plus, if you added a sunglasses chain, you’ve taken your design to the next level with both style and function!
Now it’s your turn!
Try making your own pair and let your creativity shine. Don’t forget to take pictures and share your designs—I’d love to see how you made this DIY tutorial your own.
Whether you wear them to the beach, a festival, or a casual day out, your handmade sunglasses are sure to make every moment a little more stylish.
Happy crafting!
