When do you see your favorite photos? If you’re like a lot of the rest of us these days, it’s when you’re on your phone scrolling through Instagram or Facebook. That’s such a shame! Photos carry so much joy, reminding us of beautiful times that we spent with our loved ones. So here are 16 ways that you can turn your digital photos into crafty items that you can see and appreciate through out your day.
1. Collage Letters
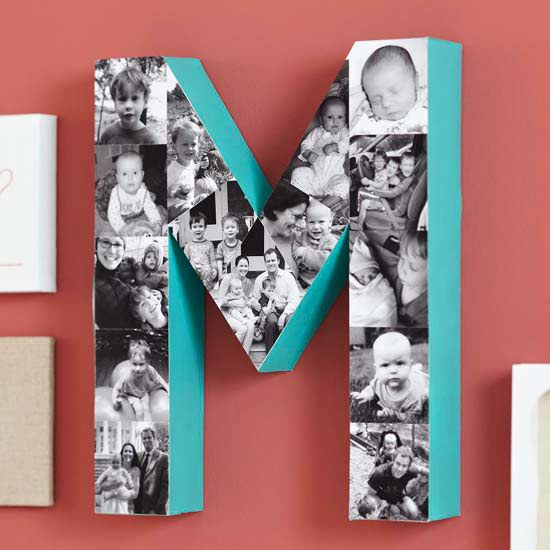
Have you seen those large wooden letters that craft stores sell? Why not cover the front with photos, and paint the sides in a pretty color? Line a few letters up to spell out an inspiring word, like “LOVE” or “JOY”. Or, you could spell out a friend’s initials, a year, or the words “MOM” or “DAD”.
2. Frame with Clips

Picture frames are common thrift store items that can be purchased really cheaply (think one or two bucks). Yes, the frame might come with a tacky picture or photo of someone you don’t know, but that’s easy to fix. Simply take out the unwanted artwork or photo. Also remove the back of the frame. Paint it a pretty color, and hang string across it. Use clips to attach your photos to the strings.
3. Window Pane Display
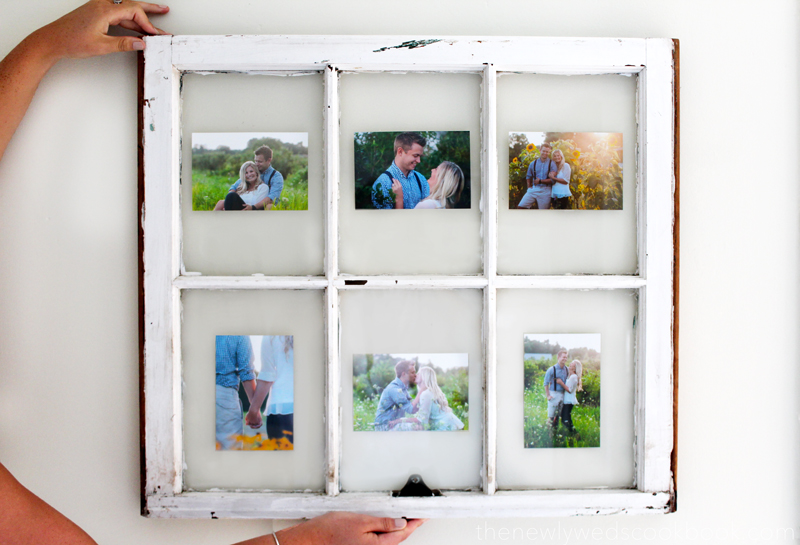
Re-purpose an old window frame by turning it into a way to display your photographs. The best part of this DIY project is that if you use a window that is broken up into several sections, you can think about telling a story with your photographs. If there are six, eight, or even twelve rectangles to work with, you can arrange your photos in a sequential way, so that you convey even more meaning with this display.
4. Thankful for Friends and Family
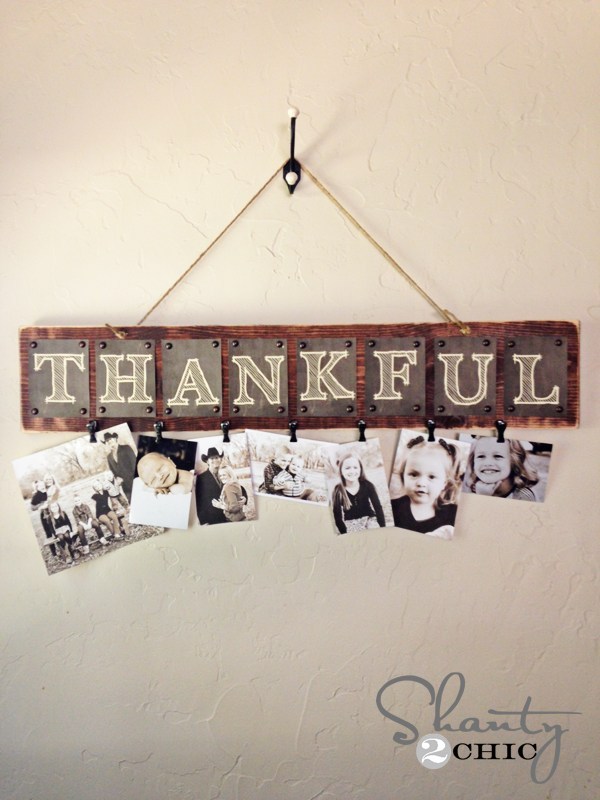
What are you thankful for? Many of us are thankful for our friends and family. What better way to remind yourself of these precious people than to put up a photo display? Glue, pin, or nail the lettering for “thankful” onto a long board. Fasten your pictures to the bottom.
5. A Beautiful Board

You can also display your pictures by mounting them on a board. Use weathered wood, like in the example above, or paint the board a colorful hue. Next, glue the photos on, using Mod Podge or another thin glue (it needs to be thin enough to paint with). Cover the whole board with the same glue when you are done.
6. DIY Magnets
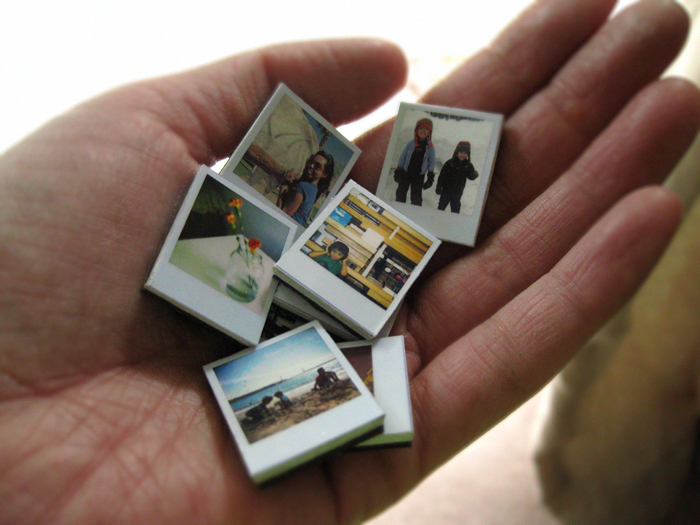
Your local craft store likely has magnetic strips. If not, order some online. Shrink your photos down into a thumbnail size, or leave them full sized and make large magnets. How many times do you open the fridge each day? That’s how many times you’ll come face to face with your favorite photos, if you take the time to complete this little DIY project!
7. Vase
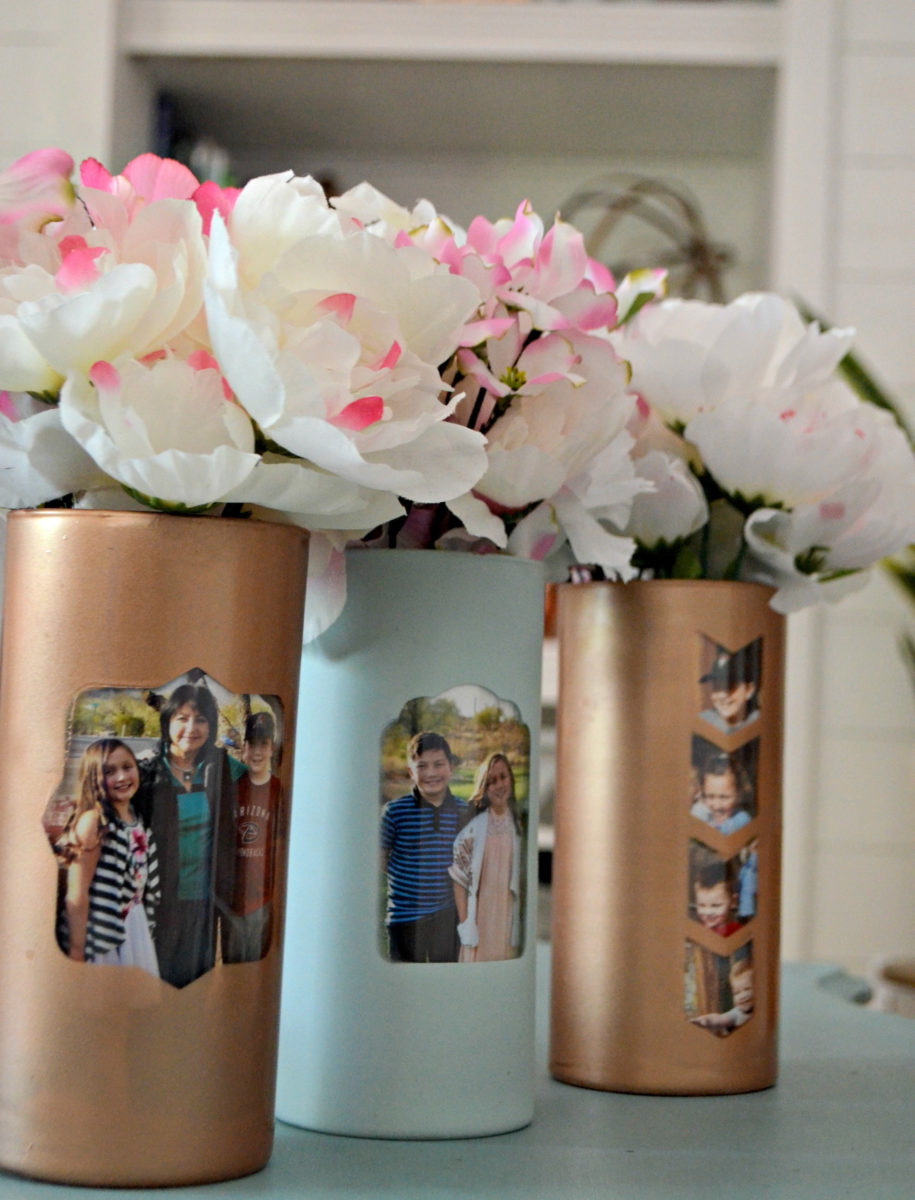
Are you looking for a crafty gift idea? You could print out photographs of you and your loved one, and create gorgeous, personalized vases with them. You can buy vases at a second hand shop, or use recycled bottles or Mason Jars. Paint the jar using spray paint, and attach the photograph with glue. If you’re giving this as a gift, fill it with fake or real flowers, first! Hope you enjoy this flower-themed DIY project!
8. Coasters
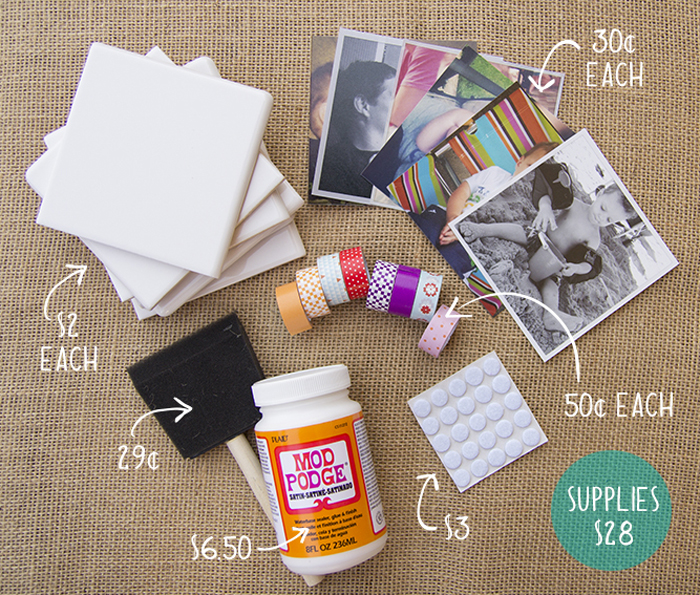
For this project you will need ceramic tiles to start out with. You will also need small felt discs to attach to the bottom of the tile, so that your coasters don’t scratch the surface they are set on. If you can’t find blank white tiles, consider using second hand ones but painting them the color that you want. This might take a few coats of paint, so be patient! And if you can not find small felt circles with adhesive backing, simply cut your own out of felt and glue them onto the tile.
9. Photo Puzzle
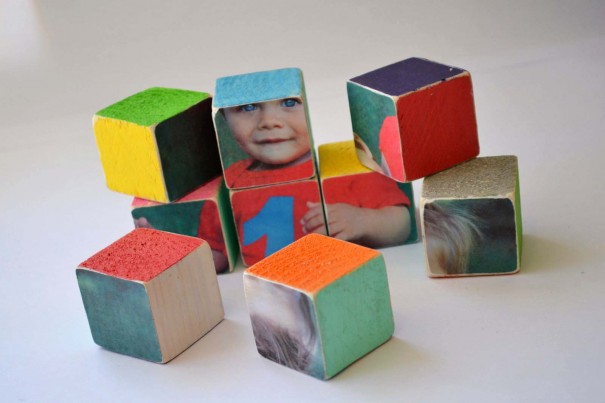
A puzzle made out of blocks is a great gift for a child! When you plan this project out, you will want to put the blocks that you’d like to use into formation (consider making a square out of nine blocks). Measure the edges. Next, enlarge a photograph to that exact size, and print it out. Again make measurements, and cut the photograph into the appropriate square sections. Glue one square of the photograph to one face of each block. This would be a great gift for a child in your life!
10. Mini Folding Album
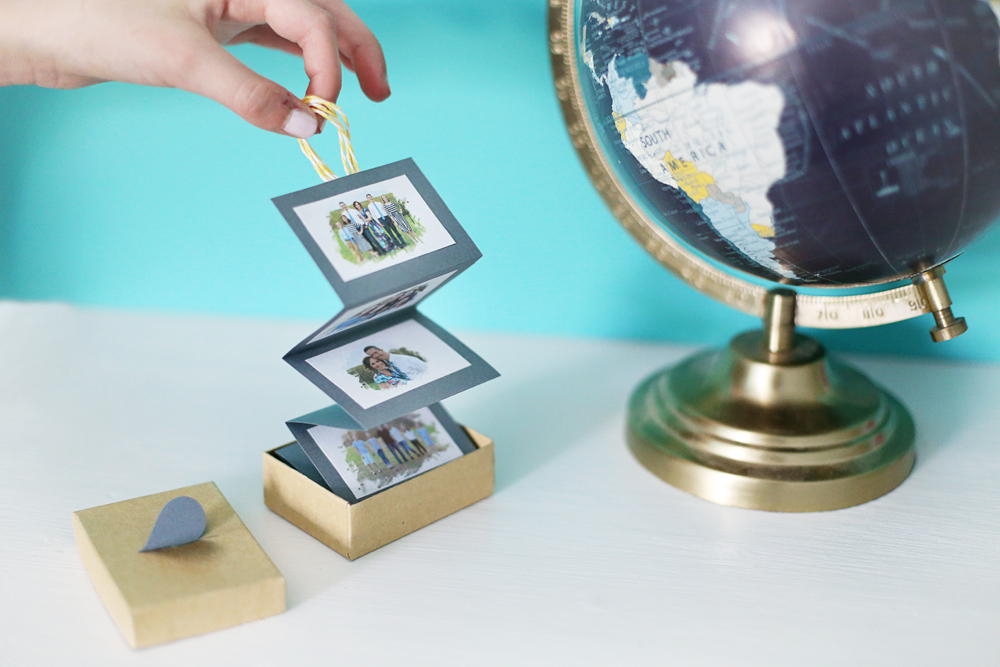
Isn’t this a sweet and simple way to enjoy photos? Ever time you pull out the folded album within the box, you will be reminded of some of your favorite events in the past. You could make mini folded albums for each vacation you take, or one for each year you were in college or in a favorite work environment. Enjoy your beautiful memories!
11. Planter
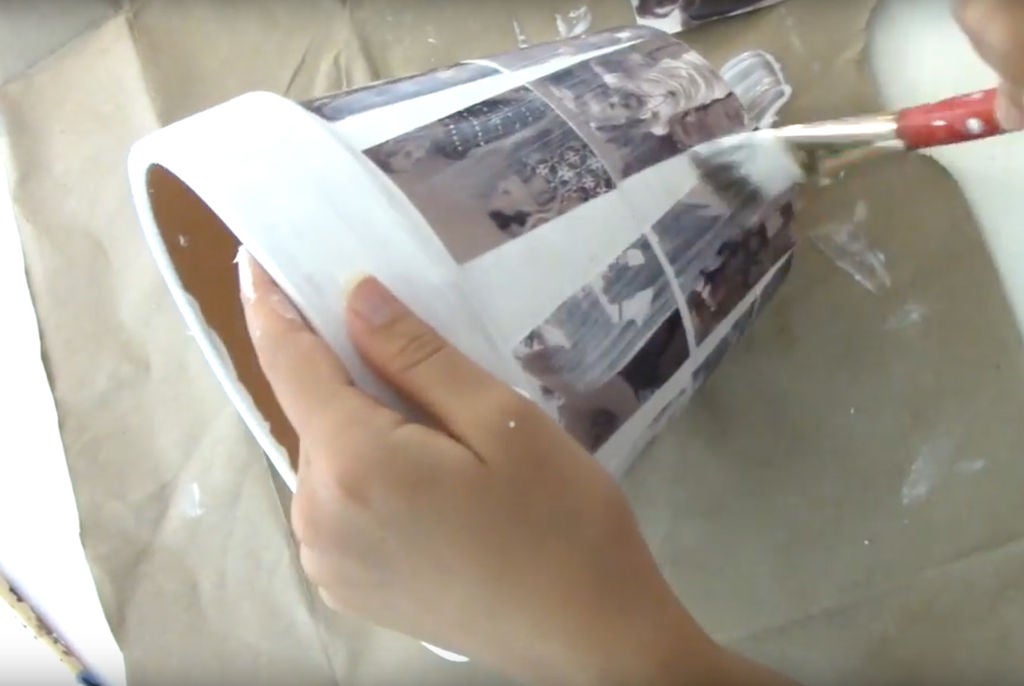
If you have houseplants on display, maybe you could add photographs to the planters. This would be an easy way to get to enjoy your photographs regularly. Clean and dry the planter. Paint the surface (optional) and then use a decoupage method to paste photographs onto the surface. Tip: Small photographs work best. If the photo is too large, it will not adhere smoothly to the pot, which is likely smaller at the base than at the top.
12. Clock
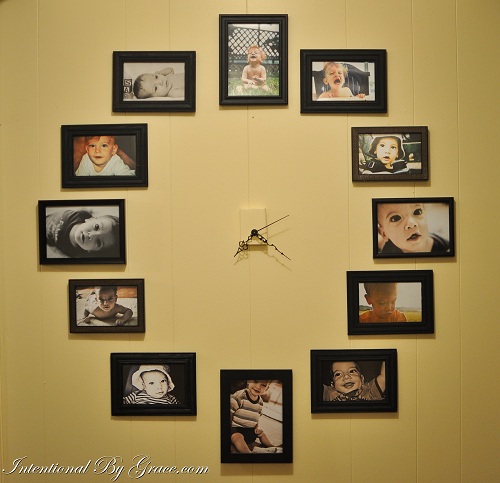
Time is a precious commodity! We all know this, yet sometimes we forget (right?). Since we all have limited time, it’s important to prioritize. What do you value? How do you want to spend your time? A DIY photo clock might be a great way to remind yourself of how you’d like to spend the hours in your day.
Now that you have some ideas for craft projects that you can do with your photos, aren’t you excited to print them out? Get digital photos out of the ‘cloud’, off of your computer, and off of your phone. Put them into your everyday environment, so that you can enjoy them regularly! Are you excited to print out some of your favorite pics? Tell us in the comments section below!
