Let’s talk about big hair because guess what? The iconic 90s blowout is back in a major way!
You know the look: tons of volume, bouncy waves, and tons of shine. And with this hairstyle, we can’t help but remember Rachel Green’s swingy hair in “Friends” or Cindy Crawford’s effortless waves on the red carpet.
Understanding the differences in wavy vs straight hair can help you achieve the perfect style.
It’s glamorous, it’s fun, and the best part? You can totally achieve this iconic style at home in under 30 minutes (yes, you read that right!).
Ready to get that head-turning 90s blowout everyone’s raving about? Keep reading!
Key Takeaway
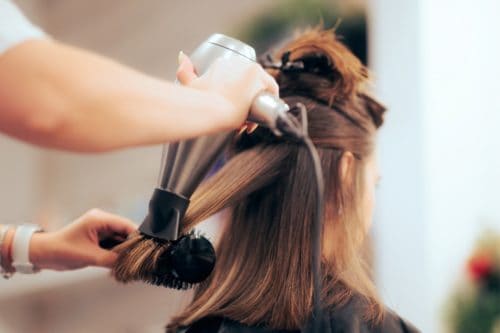
- The iconic 90s blowout hairstyle, characterized by voluminous, bouncy waves, is making a major comeback and can be easily achieved at home.
- Essential tools for the perfect 90s blowout include a blow dryer and a round brush, with heat protectant spray being crucial to prevent damage.
- Additional styling products like volumizing shampoo, mousse, and strong-hold hairspray can enhance the blowout’s volume and longevity.
- Step-by-step guidance and tips, including sectioning hair and using upward drying motions, can help recreate this glamorous, versatile hairstyle for various hair types and face shapes.
Tools and Products You’ll Need
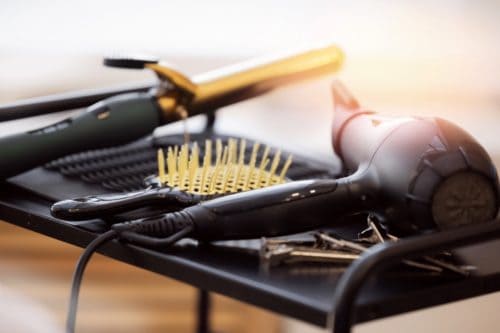
Now, you might be picturing fancy salon equipment to get that 90s blowout, but fear not! Forget complicated contraptions because we only need two essential tools.
To achieve that perfect 90s blowout in record time, we’ll be focusing on the trusty blow dryer and its partner-in-crime, the round brush.
Rice water shampoo is gaining popularity for its nourishing properties, helping to strengthen and add shine to hair. Incorporating it into your hair care routine can enhance the overall health of your locks, providing an excellent foundation for achieving that voluminous blowout look.
Blow Dryer
This is your workhorse! Look for one with at least 1800 watts of power for faster drying and a nozzle attachment to concentrate airflow. Don’t forget to spray a decent amount of heat protection on your damp hair before blow drying to shield your strands from heat damage.
Round Brush
This brush creates lift and shape. A round brush with a 1.5- to 2-inch barrel is ideal for most hair types. For much thicker hair, you might opt for a slightly larger barrel.
The key is to choose the right size brush for your hair section—a smaller brush for shorter sections or face-framing layers and a larger brush for longer sections.
These classic hairstylist staples might seem simple. But trust me, with the proper technique, they’re the secret weapon to fluffy hair with tons of volume, whether you have straight hair or layers. Don’t worry, we’ll walk you through it.
Heat Protectant (Heat Protection Spray)
This is a non-negotiable! Again, you’ll need it to shield your strands from heat damage when blow-drying. Look for a spray that offers heat styling benefits, like adding volume or shine.
Turmeric soap is a fantastic addition to your hair care routine. It may help soothe the scalp and promote healthier hair growth while adding shine. Using it in combination with your volumizing shampoo can enhance the overall health of your hair, providing an excellent base for styling.
While a blow dryer and round brush are the essentials, here are some bonus tools that can take your 90s blowout to the next level:
- Volumizing shampoo and mousse: These styling products will help create a foundation for extra volume and a bouncy blowout.
- Strong-hold hairspray: Want your blowout to last all day? A strong-hold hairspray is your friend! Apply a light mist after styling to hold your voluminous blowout in place.
- Hot rollers: These are an excellent option for adding extra oomph and a more defined wave, especially for fine hair that struggles to hold volume. Use hot rollers on damp hair sections after blow drying for added texture.
- Dyson Airwrap: This innovative styling tool can help you achieve a blowout with a more modern, looser wave pattern. While not essential, it’s an excellent option for those who want to experiment with different blowout styles.
- Hot air brush: This tool combines the round brush and blow dryer, making it a multi-tasking tool. It can be a good option for those who find it tricky to coordinate both tools at once. However, a blow dryer and round brush offer more control for a truly classic 90s blowout.
Remember, the right tools are essential! But don’t worry; we’ll focus on mastering the basics with your blow dryer and round brush first. With a bit of practice and the tips we’ll share, you’ll be a 90s blowout pro in no time!
Step-by-Step Tutorial: Prep Your Hair
Now that you have the right tools, it’s time to blow dry! I recommend following this guide to lessen mishaps when trying to achieve that perfect 90s blowout hairstyle:
- Wash hair with volumizing shampoo. This will help create a foundation for extra volume and lift.
- Apply heat protectant and volumizing mousse to damp hair. Distribute the products evenly throughout your hair, focusing on the mid-lengths and ends.
- Section your hair. For most hair types, two sections (top and bottom) will work well. Use claw clips or duckbill clips to secure sections and keep them out of the way while you style.
To begin blow-drying…
- Start with the bottom section. This ensures the underneath layers are dry and holds the volume for the top layers. Here’s where the magic happens!
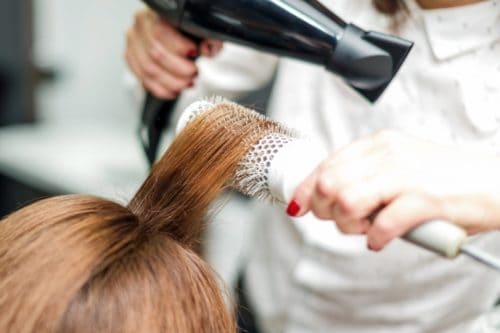
- Use a round brush to achieve bounce and volume. For the classic 90s blowout, you’ll want to use a round brush to create lift and shape as you dry. Remember, the size of the brush matters! A smaller brush (around 1.5 inches) works well for shorter sections or face-framing layers, while a larger brush (around 2 inches) is better for longer sections.
- Blow-dry hair in an upward motion. Place the round brush under a section of hair near the roots and wrap the hair over the barrel of the brush. Using your blow dryer on medium heat with the nozzle attachment, dry the hair in an upward motion, following the curve of the brush. As the hair dries, hold the tension on the section with the brush for a few seconds to set the volume and bounce.
- Repeat on the top section. Once you’ve finished blow-drying the bottom section, release the clips and repeat the process on the top sections of your hair. Pro tip: For extra volume at the crown, lift the roots as you dry using a round brush.
Optional Techniques
Besides the basic, you can even make your blowout style more eye-catching with the following techniques:
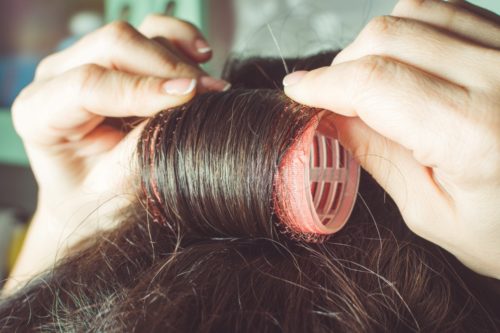
- For extra-defined waves: After blow-drying with the round brush, you can use Velcro rollers or pin curls to set the waves in place while the hair cools. This technique is great for those who want a more dramatic 90s blowout style.
- For a looser wave, use hot rollers after blow-drying sections. This is an excellent option for those with naturally wavy hair (good news!) who want to enhance their waves and add volume.
- Add curls or waves (optional): If you want to add even more texture or definition to your blowout, you can use a curling iron or wand to create curls or waves after blow-drying. Be sure to use the curling iron on medium heat to avoid damaging your hair.
Tips and Tricks for a Flawless 90s Blowout
Now that you’ve got the basic steps down, here are some pro tips from celebrity hairstylists to take your 90s blowout to the next level:
Adjust the Number of Sections Based on Your Hair Type and Length
For thicker or longer hair, you might need to work in more sections (3-4) to ensure even drying and achieve maximum volume. On the other hand, for fine hair or shorter hair, two sections (top and bottom) will likely be enough.
Use the Right Tools and Products for Your Hair Type
Not all hair is created equal!
For extra lift for fine hair, utilize a volumizing mousse at the roots before blow-drying. For thick hair, a strong-hold hairspray will be your best friend, keeping your blowout in place all day.
Remember, using the right products for your hair type is critical to achieving that perfect 90s style without weighing your hair down.
Consider Your Face Shape When Creating Your Blowout
The 90s blowout is about versatility, as you can use it to flatter your face shape.
For example, adding curtain bangs with your round brush can help elongate your face if you have a round face. On the other hand, if you have a heart-shaped face, balance out your features by blow-drying the hair with more volume at the crown.
Discover What Works Best for Your Hair by Experimenting With Different Techniques
The beauty of the 90s blowout is that it’s not a one-size-fits-all style. Feel free to experiment with the different techniques mentioned above to see what creates the most bounce and volume for your hair type.
Bonus Tip: Don’t be discouraged if your hair isn’t perfectly straight to begin with! The ’90s blowout works wonders on naturally wavy hair, too. In fact, some extra texture can actually add to the volume and body of the style.
Embrace your natural texture and use the blow-drying techniques to create a bouncy, voluminous blowout with a touch of wave.
Remember: Social media might portray the 90s blowout as effortless, but achieving that perfect style takes a little practice!
Don’t get discouraged if it doesn’t look flawless the first time. With some experimentation with these tips and tricks, you’ll be a 90s blowout pro in no time. The most important thing is to find what works best for your hair and have fun with the process!
Conclusion
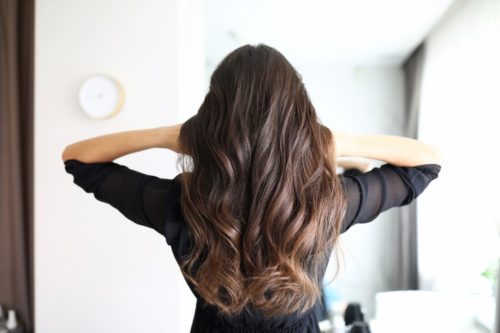
So there you have it! With a bit of help from these tips and your trusty blow dryer and round brush, you’re well on your way to achieving that iconic 90s blowout.
Remember, the 90s blowout is all about having fun and expressing your unique style!
Feel free to experiment with different techniques and find what works best for your hair type and texture. Whether you have long, flowing locks, shorter layers, or even unruly hair, you can adapt the 90s blowout to flatter your features and add a touch of bouncy volume.
For an extra twist, try incorporating y2k hairstyles into your routine to keep your look fresh and trendy.
So grab your blow dryer, channel your inner celebrity hairstylist, and get ready to rock that iconic 90s blowout! You might be surprised at how easy and versatile this timeless style can be.
